Crawlspace and Basement Underpinning

Posted: 18th April 2012 by admin in Uncategorized
Comments Off on Crawlspace and Basement Underpinning

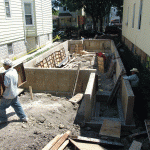
Many people would like to increase the livable space in their home but do not have the available lot space for a sizable addition. In that case, they can look to finishing their basement or changing a crawlspace to a basement to add additional living space. These extended spaces are great for adding an additional bedroom, laundry area, storage or a home theater space.

Lowering your basement floor or crawlspace is a solution that can add additional Basement Crawlspace Underpinningheight to an otherwise awkward area. Lowing of a crawlspace and sometimes a basement may involve a process called underpinning. Underpinning is a complicated project and should not be attempted without the help of a licensed and insured concrete foundation expert. It is important to check up on references and make sure that your contractor has done this kind of work previously. You are always better safe than sorry when it comes to the foundation of your home. It is the most important part of a house. Underpinning can be time consuming and expensive but it is an often necessary endeavor with an extremely rewarding conclusion.
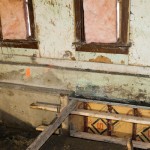
Alternately some people who start a basement or crawlspace project need to have this work done not out of a desire for more space but, out of necessity. Many homeowners have water issues caused by foundation cracks, hydrostatic pressure or sewer backups. Many face problems with improperly installed foundations, or settling of the soil over the years that are impacting their current foundation.

There are also other considerations to make when altering a basement or crawlspace floor such as adding drain tiles, sump pits, ejector pits, spray foam insulation, overhead sewers, extending support piers, etc. These are just a small sample of things to plan ahead for that may impact the success of a basement remodel or crawlspace encapsulation. We have done many waterproofing projects throughout the years that incorporate a variety of solutions geared to specific problems found in basements and crawlspaces. Give us a call if you have any questions about your next basement or crawlspace project in the Chicagoland area.

Should I use salt on concrete for de-icing

Posted: 8th March 2012 by admin in Uncategorized

This time of the year in Chicago, when faced with slick, icy concrete drives and walks, chemical de-icers and salt treatments start to look very appealing. De-icing products such as rock salt and fertilizers, while effective at making your stairs, walks and drives less slippery can be comprised of ingredients that can be harmful to your concrete. Not only will de-icing agents damage your concrete, they can cause problems with landscaping, metal supplementary parts, pets, children, yourself and the environment.

Snow angle salt melt deicer deicingMany of the most popular deicing products contain calcium chloride, ammonium sulfates, magnesium chloride, sodium chloride and Urea. If these sound like chemicals you do not want around your home and family, it is because they aren’t. These products are made of harsh chemicals that can be harmful to respiratory tracts and can cause skin reactions if handled improperly. Outdoor pets such as cats and dogs can have adverse reactions to these chemicals. The de-icing chemicals can be picked up on paws or licked off the ground, and when exposed to moister, the chemicals cause an exothermic reaction that can reach up to 175° and that commonly ends with burned paws, pads, mouths, and can cause ulcers in digestive tracts. Aside from the health dangers posed by such products to your family and pets, they can also be damaging to your brick, asphalt, concrete projects, as well as the surrounding areas.

In the case of chloride based snow and ice melting products, such as calcium chloride and sodium chloride, the main components have been known to deteriorate concrete and brick by flaking and pitting. Magnesium chloride and calcium chloride are not only harmful to concrete but pose a further problem with attracting moisture and making a slippery surface even more slippery as these products will not work at very low temperatures. Any snow or ice that has already melted will freeze up when the temperature drops to between 20° and 5° Fahrenheit. Some of the fertilizer based products are corrosive to metal and can damage vegetation. So if you notice rusty metal gates, posts and stair rails along with yellowed landscaping after a winter of using salt and snow melting products, you will know who the culprit is.

But who wants to spend the winter slipping on icy sidewalks and stairs? What line of action does Chicagoland Concrete, Inc. recommend for the harsh Midwest winter? We think the most environmentally sound, economical, and safe way of dealing with icy walks and stairs is using a two part plan of attack. We suggest shoveling any snow accumulation before it starts to melt and freezes again, leaving a slippery layer of ice. Then cover the area with sand. While sand does not melt ice or snow, a heavy layer of it should provide a good measure of traction.

We hope that this article has helped inform you of the hazards of snow and ice melting products and helped you formulate a game plan for the upcoming winter months. If you have any further in depth questions, please feel free to contact the professionals at Chicagoland Concrete, Inc. in the office or via the website through the “Contact Us” tab. As always, please feel free to leave your comments on this post.

Why did my new Concrete Crack???

Posted: 14th February 2012 by admin in Uncategorized

Being a Chicago Concrete Contractor I always get phone calls in the springtime about other contractors’ work. The most common question is, “Why did my new concrete crack?” With that, I regretfully tell them that the sad truth is that all concrete will crack, and usually well within the first year of placement. Why?? When concrete is curing it will shrink on average 1/16th of an inch for every 10 linear feet. This may sounds like an insignificant number, but shrinkage cracking is a common concrete flaw. Concrete is a super product under compression, but when subjected to tension it is prone to failure much more rapidly. Add to that, in colder climates such as Chicago, we have a freeze/thaw cycle to contend with.

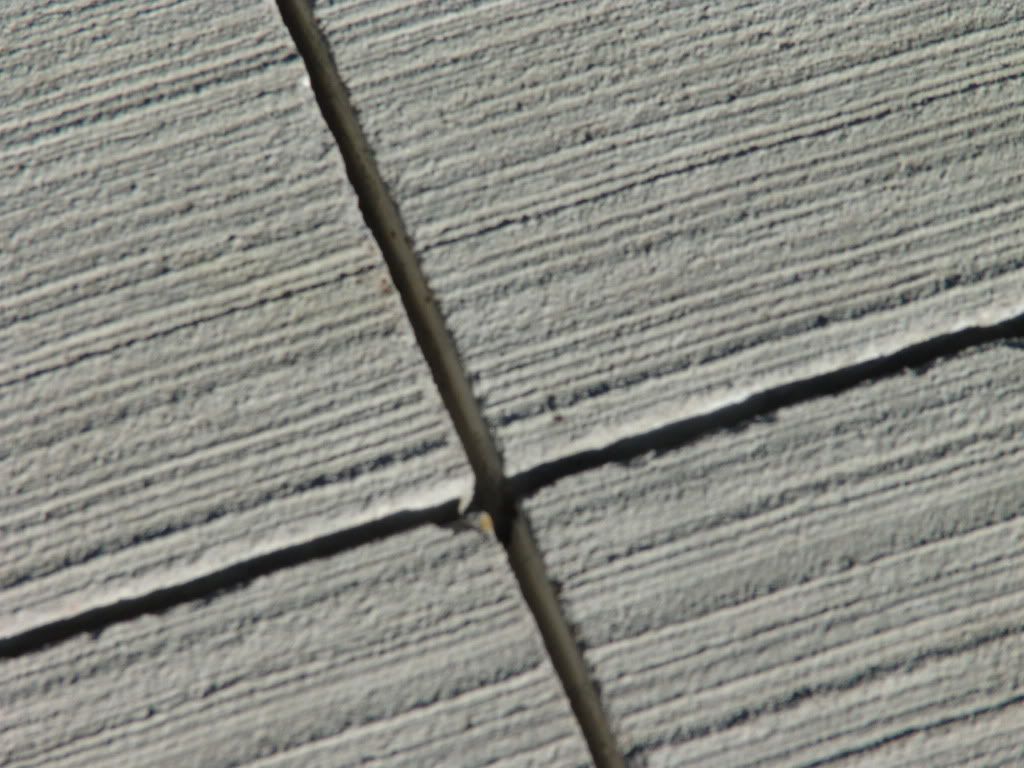
Saw Cut “Control Joint”

There are ways to help avoid new concrete from cracking (in visible locations). How?? As bad as it sounds, EVERY contractor hides them in what is called a “control joint”. This is basically a grove tooled or cut into the concrete to help relieve the stress of the concrete. There are basic rules to follow when placing these control joints regarding spacing and at corners. When a contractor has been finishing concrete long enough, they know where to place these joint and maintain a pleasing appearance.

The next problem that sidewalks, patios, driveways, and other slab on grade concrete faces in Northern climates is freeze/thaw cycles. Every winter the ground freezes and heaves the ground upwards. When the sun comes out, it thaws the ground, and it does not always do it evenly. This means that a portion of the slab in the sun may thaw and start to drop while the section it is attached to is in a shadow and stuck on higher frozen ground. This stress will also cause the concrete to crack, “hopefully” at the control joints which were placed there for just that reason.

As silly as it may sound, try looking a little closer to those joints and see if you can spot the cracks. Hopefully this article will help you understand some of the behaviors of concrete a bit better and will allow you to interview your Concrete Contractor more carefully.

Fiber mesh Vs. W.W.F. (Welded Wire Fabric)

Posted: 12th January 2012 by admin in Uncategorized

As a licensed concrete and brick mason in the City of Chicago, I’m often asked what the difference is between fiber mesh and WWF (welded wire fabric) when giving estimates. My first response to home owners is “Turn and RUN from any contractor who tells you ALL you need is fiber mesh because it’s stronger than WWF”.

So what is fiber mesh and what’s it for? Fiber mesh is an additive of synthetic fibers usually added at the mixing plant. The fibers are used to solve a very particular problem called shrinkage cracking. In the first few days of freshly poured slab life, the water in the initial mixing is evaporating from the concrete and it’s actually shrinking ever so slightly. The problem is that concrete does not shrink evenly as a whole, think of it more like a pie cut into four or more pieces. The concrete is shrinking away from each individual cut and in on itself. This is why we put in control joints (the lines in you see either tooled or cut into the concrete) to help dictate where the concrete will crack.

The fiber mesh’s job is to help hold the concrete together in that initial drying phase only, and when it cures, does little to NOTHING to add to the strength of the concrete. So why use is it that contractors will steer you towards substituting fiber mesh for WWF, because the contractor either is pulling the wool over the customers eyes or doesn’t know any better themselves. It sounds good, like a high tech answer to an age old problem, but it isn’t.

So what does the WWF do? That is another good question, and the answer depends on where the contractor places the WWF during the pour. If the WWF is lying on the ground and is never lifted into the pour, it then is not very effective. If it is lifted and suspended in the concrete, it then serves two purposes. First, when it does crack and it WILL CRACK (any contractor who says the other is someone to stay clear of) the WWF helps keep the two now separated cracks from spreading apart from one another. The second thing WWF does is to keep two sections of concrete that are divided by a crack in the same plane (meaning that one won’t sink while the other sticks up). These two attributes along with properly placed control joints will help give your new concrete a chance at long life.

Please feel free leave any comments or use the Contact Us tab and ask any other questions that you may have.

-ChicagolandConcrete.com

Concrete Movement and the Frost Line

Posted: 1st December 2011 by admin in Uncategorized

At this time of year, Chicagoland Concrete, Inc. receives many questions about the frost line and how it can affect poured concrete projects, including footings, foundations and flatwork.  Wikipedia defines a frost line (also referred to as “frost depth” or “freezing depth”) as “the depth to which the ground water in soil is expected to freeze.”  Footings, foundations and flatwork can be adversely affected by frost heave if poured improperly or at the wrong depth.  If the underground sections of the supporting architecture are above the frost depth, the pressure imposed by the freezing and thawing of the ground water in the soil can result in cracked concrete which could end in considerable structural damage and consequently, costly and significant repairs to a home or project.  Improperly installed concrete structures have been recorded to move or “heave” between three and four inches during a freeze/thaw cycle which can cause not only damage to the aesthetics of a project but also deterioration to the structural support.  This can result in damage to the foundation which can lead to water issues in a basement or, worst case scenario, structural collapse.

Frost lines through the United States can vary broadly.  For example, some of the Northern states have a frost line that can reach as deep as 60 inches while parts of Florida have no frost line at all.  The Midwest portion of the country has a frost line that goes between 30 and 40 inches on average.  Currently, the frost line in the Chicago area is recorded at 40 inches, which means that the water in the soil has not frozen at levels deeper than 40 inches below ground.  In the Chicagoland area, building codes require that supporting structures are poured at least 42 inches below the ground; however, many architectural plans dictate digging to a deeper level to accommodate any future changes in the average frost line.  When it comes to the foundation of your home, it is better to be safe than sorry.

We hope that this article has helped with some basic questions you may have regarding frost lines, frost heave and how it can affect your home or concrete project.  If you have any further in depth questions, please feel free to contact the professionals at Chicagoland Concrete, Inc. in the office or via the website through the “Contact Us” tab.  As always, please feel free to leave your comments on this post.

Why is stamped concrete so expensive?

Posted: 5th November 2011 by admin in Uncategorized

Being one of only a few licensed Chicago Concrete Contractors doing estimates for clients in the Chicagoland area and showing pictures of completed work, I always get the ooh’s and aah’s when they see the stamped concrete pictures. Then, when the prices are figured the first questions are, “Why is it so expensive?” and “What is so different about stamped concrete compared to regular concrete?”

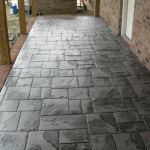
So, why is stamped concrete so expensive? Well, to start off with, it takes a bit more planning to pull everything off for the big day. The client needs to pick out three things; the stamp design, the integral color of the concrete, and the color of the release which gives the highlights. The next step for the contractor depends on if the contractor owns their own stamps or needs to rent them. Chicagoland Concrete, Inc. does own their own stamps and makes this step easier as the alternative is renting them. Renting becomes a problem for contractors because the stamps are not always available when the job requires them. It can also be cost prohibitive to purchase a set of stamps as they can run upwards of $2,000-$3,000 for a complete set. The next issue at hand is ordering the concrete and either coloring it in the truck on-site, or ordering it straight from a ready-mix supplier if the supplier stocks the required color and then paying a hefty premium. There is also an additional charge that the ready-mix supplier charges for a special mix that reduces certain additives that won’t react to the integral coloring, on top of a charge to wash out the truck. If you mix the integral color on site, you will be adding waiting time to the ticket which in the Chicagoland market runs about $3/min. When the colored concrete is placed, it is finished smooth just like normal concrete then a release color (think of powdered sugar) is spread on the surface of the concrete serving a dual purpose. The release allows the stamp to peel off the surface while not sticking to the wet concrete and also impregnates the concrete with the secondary color. Once the concrete has cured, usually the next day, the crew returns and washes off the excess release from the concrete. Then next step is to wait till the water evaporates completely off. Then a special sealer is used to protect the surface and bring out the color, usually two to three coats is needed to ensure proper coverage.

To sum everything up, the coordination of renting the stamps, purchasing the coloring, the release, paying for the extra waiting time, paying a washout charge, extra labor to stamp the concrete after finishing, the second day to wash off the release, and then applying the sealer add up quickly. It typically adds up to the tune of about 50% over the cost of traditionally placed concrete. Is the additional cost worth it? In my personal opinion, Yes, It adds value and sets your driveway, sidewalk, or patio apart from the miles of other plain concrete in your typical neighborhood. It also is a lot less maintenance and is cheaper than brick pavers which most people see as the alternative.

We hope this article helps you to understand some of the logistics involved to bring you the completed stamped concrete product.


-Chicagoland Concrete, Inc.

As a Chicago Concrete Contractor serving Chicago, IL and all surrounding suburbs, I always find myself helping our clients become more educated on the concrete they will be receiving. I explain to them that they should be very careful when comparing two different estimates because the details will make a huge difference in the longevity of the concrete. All concrete is not created equally!!! Like our modern food ingredients, concrete has gained many additives that offset the expensive ingredients. One of those expensive ingredients in concrete is Portland cement.

In the earlier days of ordering concrete, the concrete contractor would simply ask the ready-mix supplier for a mix based on the number of bags of Portland cement added, i.e. 5 bag, 6 bag, ect. which would dictate the compressive strength of concrete. Today with all the additives and mix designs for different applications, the deciding factors after all the ingredients are added is still the compressive strength measured today in PSI (Pounds per square inch) that the concrete can withstand before failing. So does that mean the stronger the better? Not necessarily, there is a point of diminishing return when the average homeowner or concrete contractor gets too smart for their own good. High amounts of Portland help contribute to shrinkage cracks along with too much water. These are just the beginning of many problems that most contractors do not consider when placing an order for their clients concrete.

So what is a good mix to use? It all depends on the application. Foundation footings and walls are usually poured using a 3,000 PSI mix and is usually more than sufficient for most foundation purposes. For interior flatwork which is not exposed to freeze thaw cycles, a 3,000 PSI mix without air entrainment should work fine in most cases. Where things start getting a little tricky are in the outdoor arena where freezing and thawing cycles will take its toll. We recommend a 6-1/2 bag mix or 4,000 PSI concrete with a 6-8% air entrainment and low slump in the 3-4“range to avoid Spalling of the surface from the winter. Then depending on the weather conditions, one might add fiber-mesh and a retarder to help the workability of the concrete and avoid shrinkage cracks. Also depending on the application, there are many other additives that the run of the mill concrete contractor is unaware that exist to make the job easier and provide a lasting product for the homeowner. Buyers beware; check that your contractor has a “Concrete Masons” License and not a “Home Repair” license.

Chicago Concrete Contractors Service Areas

Posted: 11th September 2011 by admin in Uncategorized
Comments Off on Chicago Concrete Contractors Service Areas

Chicago and Chicagoland service area includes all surrounding suburbs such as Evanston, Wilmette, Kenilworth, Winnetka, Glencoe, Highland Park, Highwood, Lake Forest, Lake Bluff, North chicago, Zion, Winthrop Harbor, Oak Park, River Forest, Elmwood Park, maywood, Melrose Park, Berkeley, Bellwood, Northlake, Westchester, Elmhurst, Addison, Villa Park, Lombard, Glendale Heights, Carol Stream, Oakbrook Terrace, Glen Ellyn, Wheaton, Winfield, West Chicago, Licolnwood, Morton Grove, Golf, Glenview, Skokie, Northfield, Bannockburn, Deerfield, Lincolnshire, Mettawa, Green Oaks, Cicero, Berwyn, Riverside, North Riverside, Westchester, Countryside, Hinsdale, Clarendon Hills, Oak Brook, Westmont, Darien, Norridge, Park Ridge, Des Plaines, Mt. Prospect, Arlington Heights, Palatine, Rolling Meadows, Inverness, Barrington, Barrington Hills, North Barrington, Tower Lakes, Fox River Grove, Cary, Algonquin, Lake in the Hills, Summit, Bridgeview, Justice, Burr Ridge, Willow Springs, Lemont, Park Ridge, Wheeling, River Grove, Rosemont, Wheeling, Buffalo Grove, Vernon Hills, Mundelein, Round Lake, Round Lake Beach, Round Lake Heights, Round Lake Park, Lake Villa, Burbank, Evergreen Park, Oak Lawn, Chicago Ridge, Blue Island, Robbins, Midlothian, Oak Forest, Tinley Park, Worth, Palos Hills, Palos Heights, Palos Park, Orland Park, Morton Grove, Golf, Glenview, Deerfield, Libertyville, Grayslake, Riverdale, Dixmoor, Glenview, Northbrook, Calumet Park, Blue Island, Harvey, Markham, Thomton, Lake Villa, Long Lake, Fox Lake, Elmwood Park, River Grove, Franklin Park, Elk Grove Village, Schaumburg, Hanover Park, Streamwood, Hoffman Estates, South Barrington, Barrington Hills, Bensenville, Wood Dale, Itasca, Roselle, Carpentersville, St. Charles, Geneva, Batavia, Montgomery, Oswego, Sauganash, Edgebrook (North), Edgebrook (South), Sauganash Woods / River’s Edge, Ravenswood Manor, Ravenswood Gardens, Norwood Park, Edison Park, Belmont Heights, Garfield Ridge, Clearing, Mount Greenwood, Morgan Park, Hegewisch, Hazel Crest, Homewood, Flossmoor, Olympia Fields, Matteson, Richton Park and more. Zip Code : 60605, 60610, 60611, 60601, 60602, 60603, 60604, 60605, 60606, 60610, 60611, 60654, 60606, 60610, 60611, 60625, 60630, 60640, 60614, 60640, 60660, 60618, 60641, 60618, 60657, 60613, 60614, 60625, 60659, 60613, 60618, 60657, 60625, 60659, 60646, 60630, 60610, 60614, 60625, 60640, 60626, 60618, 60657, 60640, 60660, 60613, 60659, 60645, 60613, 60657, 60639, 60634, 60641, 60707, 60622, 60647, 60630, 60631, 60646, 60647, 60651, 60624, 60647, 60641, 60639, 60641, 60622, 60647, 60614, 60643, 60608, 60615, 60609, 60653, 60620, 60619, 60608, 60636, 60615, 60637, 60653, 60629, 60605, 60607, 60608, 60616, 60649, 60617, 60619, 60637, 60615, 60637, 60609, 60621, 60607, 60606, 60607, 60610, 60612, 60622, 60661, 60608, 60616, 60606, 60622, 60610, 60661, 60607, 60622, 60612, 60607, 60612, 60622, 60647, 60610, 60402, 60130, 60398, 60515, 60201, 60202, 60203, 60035, 60540, 60563, 60564, 60565, 60453, 60454, 60456, 60457, 60458, 60459, 60301, 60302, 60303, 60304, 60305, 60173, 60179, 60192, 60193, 60194, 60195, 60196, 60076, 60077, 60091, 60093